Dr.(Phys.)Dipl.-Ing.Ralf-Udo Hartmann
Develop Your Own FilmBesides offering you a more intimate role in the process, doing your own processing can possibly save you money and definitely save you time. It’s not difficult to do, and I guarantee that even a mediocre job will be better than the one done by most labs, simply by virtue of the fact that you’ll baby your film because it’s yours. Also, unlike a lab, you won’t be using watered-down developer from the lowest bidder, you won’t have to rush any part of the process, and when your negatives come out great you can take all the credit!
And a disclaimer: the method I’m outlining is a very non-technical approach with little concern for best practices. If your photography teacher saw you doing it this way they’d probably fail you. Masters of the craft use thermometers, real stop both, squeegees, filtered water, and more accurate timing. I’ve glossed over them here because I think it’s important to start with the basics and remove the pretense as a barrier to entry.
A Very Brief Overview of the Science Involved
There are entire books on the subject, but from a practical standpoint this is all you need to know: light gets reflected off surfaces and through the lens of a camera, past an open shutter, and falls onto a piece of plastic coated with layers of light-sensitive emulsion. Silver halide crystals in the emulsion react by forming clusters of silver ions, creating a latent image. When the film is submerged in developer, it transforms the silver ions into pure silver, leaving behind the halide crystals that weren’t struck by light. Those excess halide crystals are washed away with a second chemical called fixer, leaving metallic silver grains that are denser where the light was more intense during the exposure, producing a visible negative image.
 Phase I: Acquiring the Necessary Materials
Here’s the bare minimum equipment you’ll need to develop either 35mm or 120/220 film. The links and prices given are from B&H Photo in New York for your convenience; I have no affiliation with them. You can get most of these things at any larger photography store, and you might already have a few of them around the house. Besides the development tank and chemistry, a lot of this stuff can be faked (but I don’t recommend it the first time around.) eBay is also a great source, especially for used tanks.
Of course, you’ll also need some exposed film, and it’s probably a good idea to get some protective sleeves for storage. Even though I’ve listed Ilford chemistry, you can use it on any brand of traditional black & white film (Kodak, Fuji, Agfa, Efke, Macophot, whatever.) These chemicals won’t work with C-41 "black & white” film (such as Ilford XP2, Kodak BW400CN, etc.) When in doubt, check the packaging for any mention whatsoever of "C-41.”
Additional things you’ll need: a room that you can make completely dark (a bathroom works perfectly) or a change bag, a source of clean running water, something to stir with, an old towel, and a time-keeping device.
Phase II: Preparing the Tank
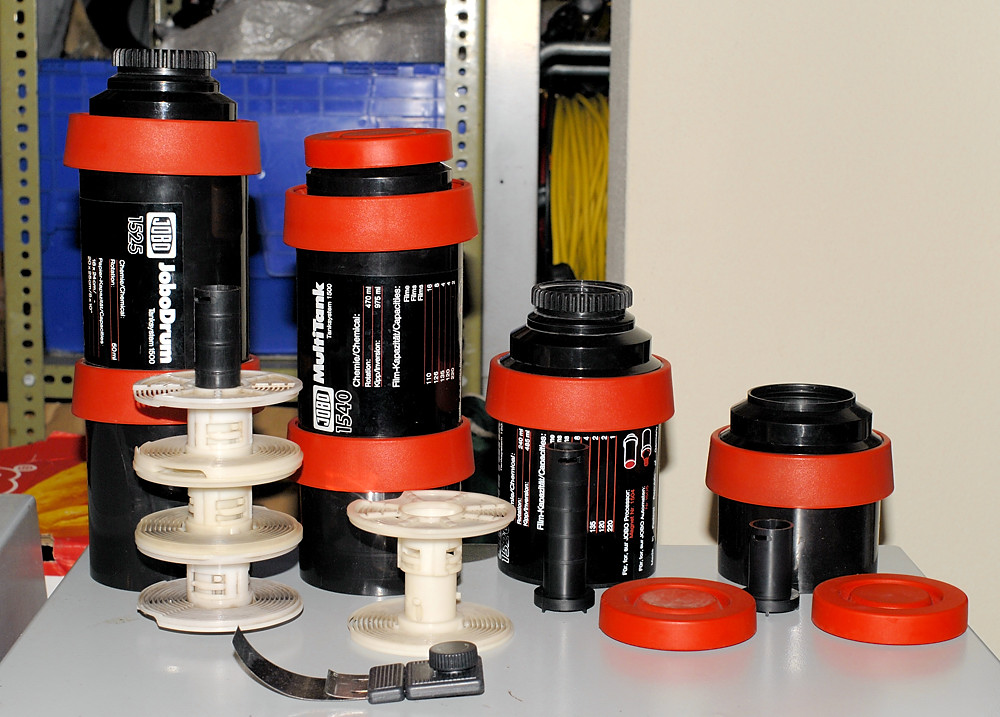
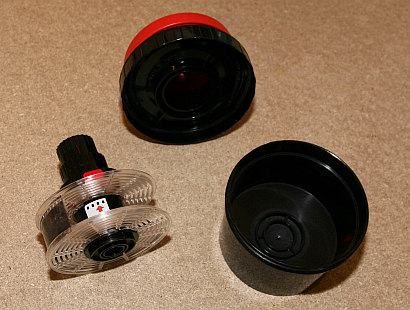
First, find your developing tank and take it apart. There’s essentially five parts: the tank itself, the center column, the reels, the screw top, and a red push cap. If you got a brand of tank other than the one I recommended you might have a couple extra items, such as a soft plastic ring for an improved seal around the top, or an agitation rod. By the way, developing tanks and reels come in two basic styles, the plastic kind and the stainless steel kind. Here I’m talking about the plastic kind, which I personally feel are easier to work with. The steel kind has a different top and no center column, and the reels are just metal spirals with nothing to help you ease the film in.
3. Get one of the reels. If you’re developing 35mm film, you’re probably already good to go. If you’re doing medium format, you’ll need to adjust the size of the reel do accomodate the larger film. You’ve probably already noticed that the reel is in two parts and has a twisting mechanism. If you twist it a little bit past where it normally stops it should easily come apart. Don’t force it; if it doesn’t come apart easily, try twisting the other way. With the reel in two pieces, notice that one of the pieces has a long groove in it along the axis, with three lateral grooves that intersect it. The other piece has a little tab that locks into one of these grooves, depending on what width you need. The first groove is for 35mm, the second one is for 127 format, and the outermost one is for 120. Rejoin the reel by sliding the half with the tab along the long groove of the other half, then turning it into the shorter lateral groove of your choice. It should click into place, and still allow for some free twisting motion. This sounds more complicated than it is; once you have a reel in front of you it should make a lot better sense, I promise.
Your tank and reel are ready. Now you’ll need a completely dark space. Again, a bathroom works great for this, especially if it doesn’t have windows. A closet works well, too. It should be totally, utterly devoid of light. If you’re using a room and you can see light from beyond it around the seams of the door, you’ll need to seal it somehow. Use duct tape. You shouldn’t be able to see any light whatsoever. Did I mention that it had to be dark? Because it does. If you don’t have a windowless bathroom available, another option is getting a cheap change bag.
 Phase III: Loading the Film
Before you turn out the lights, get everything you’ll need together right in front of you so you won’t have to fumble around in the dark. In addition to your tank, reel, and film, you’ll also need a pair of scissors and a bottle opener to get the film out of its canister. Also, if you have a dead roll of film or some you don’t mind destroying, it’s a tremendously good idea to practice loading the film onto the reel in the light before you do it for real. It might be a little tricky at first, but you’ll get the hang of it in no time.
1. Have all the pieces of the tank out in front of you.
2. Turn off the lights.
3. Use the bottle opener to open the film canister. Pretend the bottom side of the canister is a bottle cap. If you’re doing 120 film, tear off the paper seal.
4. Take the film out. Handle it around the edges at all times. Cut off the leader portion on the beginning of the roll and throw it away.
5. Feed the end of the film into the little tabs that mark the beginning of the reel. Make sure it’s in by a few centimeters.
6. Twist the reel back and forth. There are little ball bearings under the tabs that serve to grip the film and draw it in. Keep going until all the film is on the reel, then cut off the last portion that’s still connected to the spindle, which can now be thrown away.
7. Put the reel into the tank over the center column. Screw the lid on straight and tight.
8. Turn the lights back on and find your pants.
Your film is now in a lightproof tank. It can sit there forever if you want, so if you reach this point and want to leave it until next week that’s totally fine. The point of the reel is to keep the film from touching itself, which would cause it to stick together and develop unevenly, which would be bad.
Phase IV: Development
Here’s an overview of the process:  Pre-soak (1 minute for 35mm, 5 minutes for 120)
Developer (time varies, usually 7-12 minutes)
Stop bath (1 minute)
Fixer (5-10 minutes)
Wash (20-30 minutes)
Wetting agent (1 minute)
Dry (4-8 hours)
1) Pre-soak. To start, all you have to do here is put some water in the tank and let it sit for a minute, then pour it out. 120 film should be soaked a few minutes longer than 35mm, and when you pour out the water it’ll probably be dark green or blue. I suspect this is because of the paper backing rubbing up against the film because there’s no difference between the emulsion used in different film sizes. Either way, don’t worry about it. 2) Developer. Before you do this step, make sure you know long you’re going to be leaving the developer in the tank because timing is critical. Check the Massive Dev Chart at digitaltruth.com, which should have your particular film/developer combination (it might also be printed on the developer itself). Once you have it figured out, use the beaker to prepare the appropriate dilution. For instance, if the time has "1+9” next to it, that means one part developer and nine parts water. If the total volume of your tank is 500ml (you can check by filling it with water and pouring it into the beaker and then pouring it out), you need 500/(1+9) = 50ml of developer, so pour that amount into the beaker and then fill it to the 500ml line with room-temperature tap water.
Pour the diluted developer into the tank. Don’t do it slowly, but don’t do it so fast that you cause the tank to overflow. Make sure you have enough to completely submerge the film. Once you’ve finished pouring, start your timer and put the push-cap on the tank. Agitate the tank for ten seconds once every minute while you’re developing. Don’t shake the tank like a can of soda, instead flip it over firmly several times. Once time is up, pour the used developer down the drain (don’t worry, it’s safe) and then immediately proceed to step 3.
3) Stop bath. If you were fancy, your stop bath would be a chemical designed to halt the developing process on contact. For our purposes, water will suffice nicely. Just fill the tank up with water, shake it a little bit, then pour it out. Repeat twice.
4) Fixer. The timing for the fixer isn’t as critical as the developer. In fact, it’s not critical at all. Prepare the dilution first (if you’re using Ilford Rapid Fixer it’s 1+4), then pour it in the same way as the developer. Agitate it for ten seconds, then again for ten seconds every minute. Fix for 5 to 10 minutes, then do another rinse.
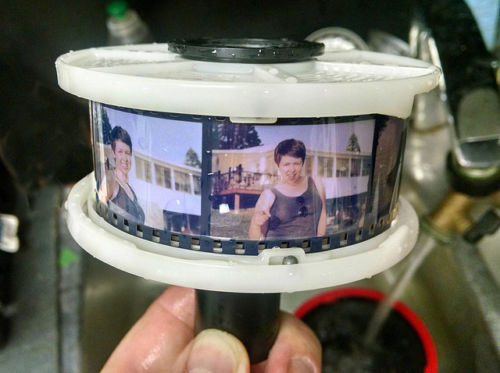
5) Wash. After it’s been fixed, the film can be safely exposed to light. Unscrew the top of the tank and set it aside. Pull the reel out and take a look at the film to make sure everything went okay, but resist the temptation to take it off the reel just yet. Don’t worry if your film has a slightly purple tint; this is normal. If it looks excessively purple you might need to fix it a bit longer. Otherwise, you’re ready to wash. Techniques vary widely, but this is how I do it: fill the tank halfway with fresh water, agitate vigorously for half a minute or so, pour the water out, repeat. Do this for 10 minutes. You want it really clean; if there’s any fixer left on the film when it’s drying you’ll be sorry.
6) Wetting agent. This last step before drying prevents water spots and helps speed the process. Dump any remaining water out of the tank. Pour a very small amount of wetting agent into the bottom and then fill with water slowly until the reel is submerged. It may foam a little; if it does, tap the sides of the tank to shake any bubbles off the surface of your film. Leave it for 30 seconds, then pour everything out and take out the reel. Don’t rinse!
 7) Dry. Twist the reel apart and lift one half of it off. Carefully pinch one end of the roll (where there’s no exposures) and lift the film off the reel, letting it unfurl. Don’t let it touch the ground or anything else. Anywhere dry and relatively dust-free will work fine, but I recommended hanging it up in your shower since it’s out of the way. The film clips come in a set of two, and one of them has a weight inside. The weighted one goes on the bottom of the roll, the other one goes on the top. Some clips have teeth that are designed to pierce the film in order for a better grip, which is a good thing; just be careful not to puncture one of your exposures. Once it’s up, leave it for 4 to 8 hours so it has time to dry and harden completely.
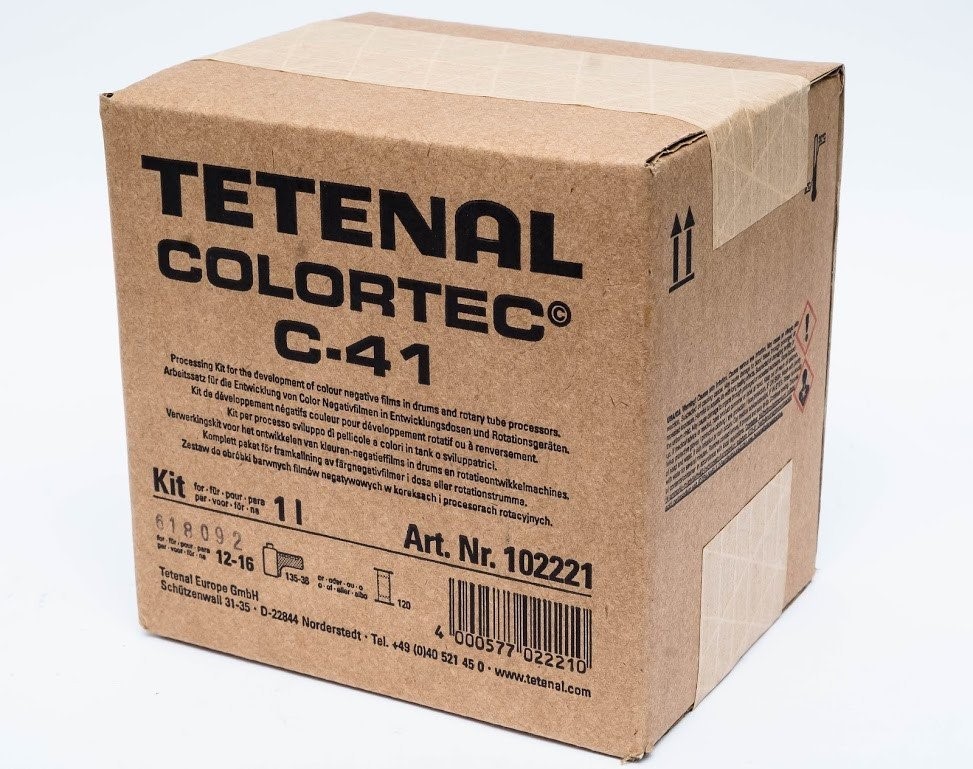
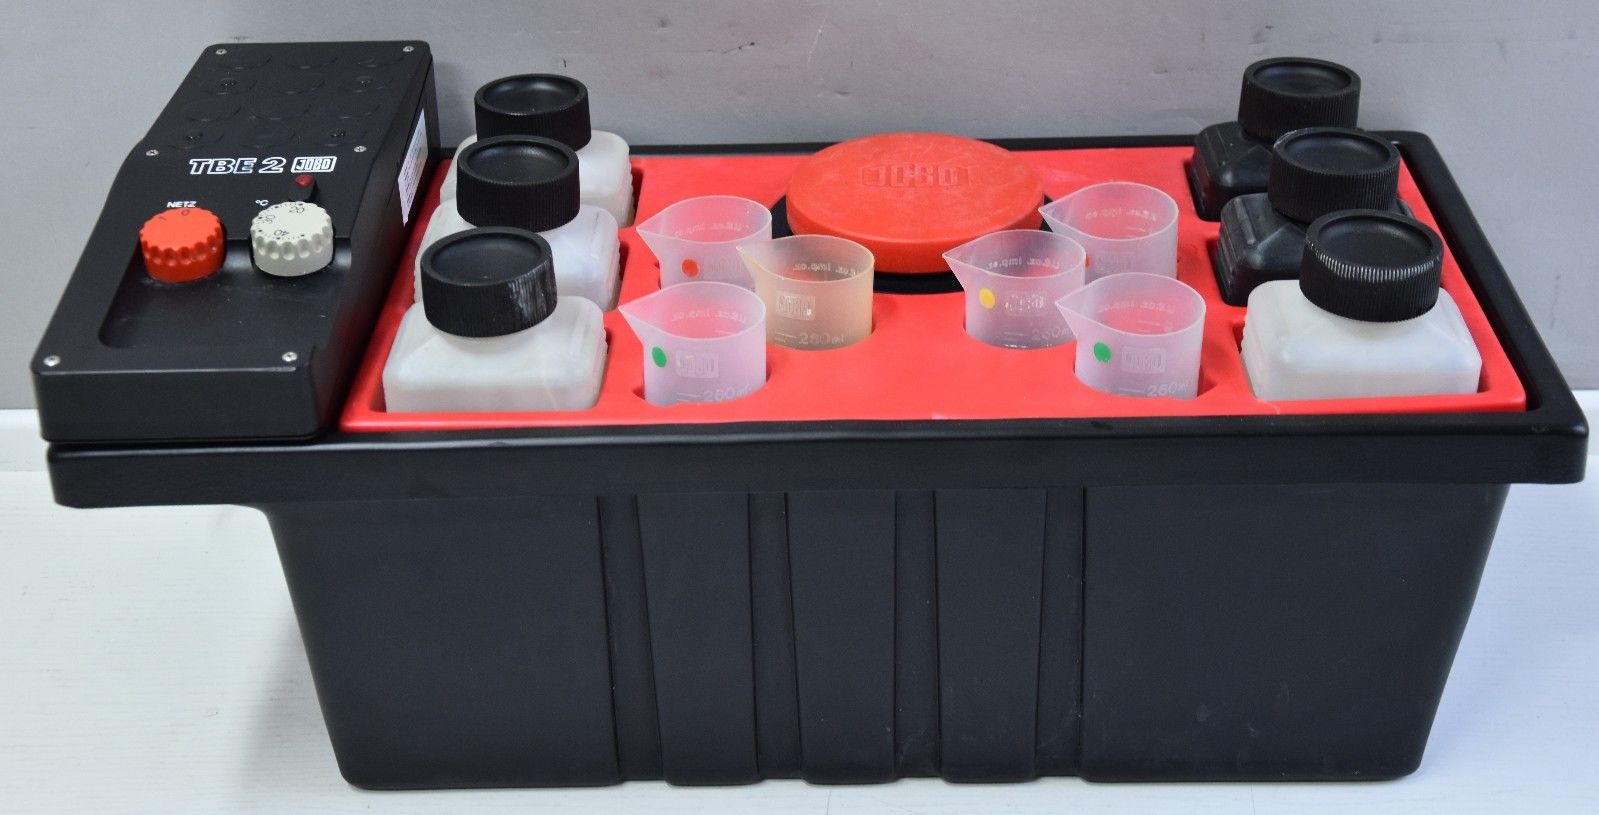
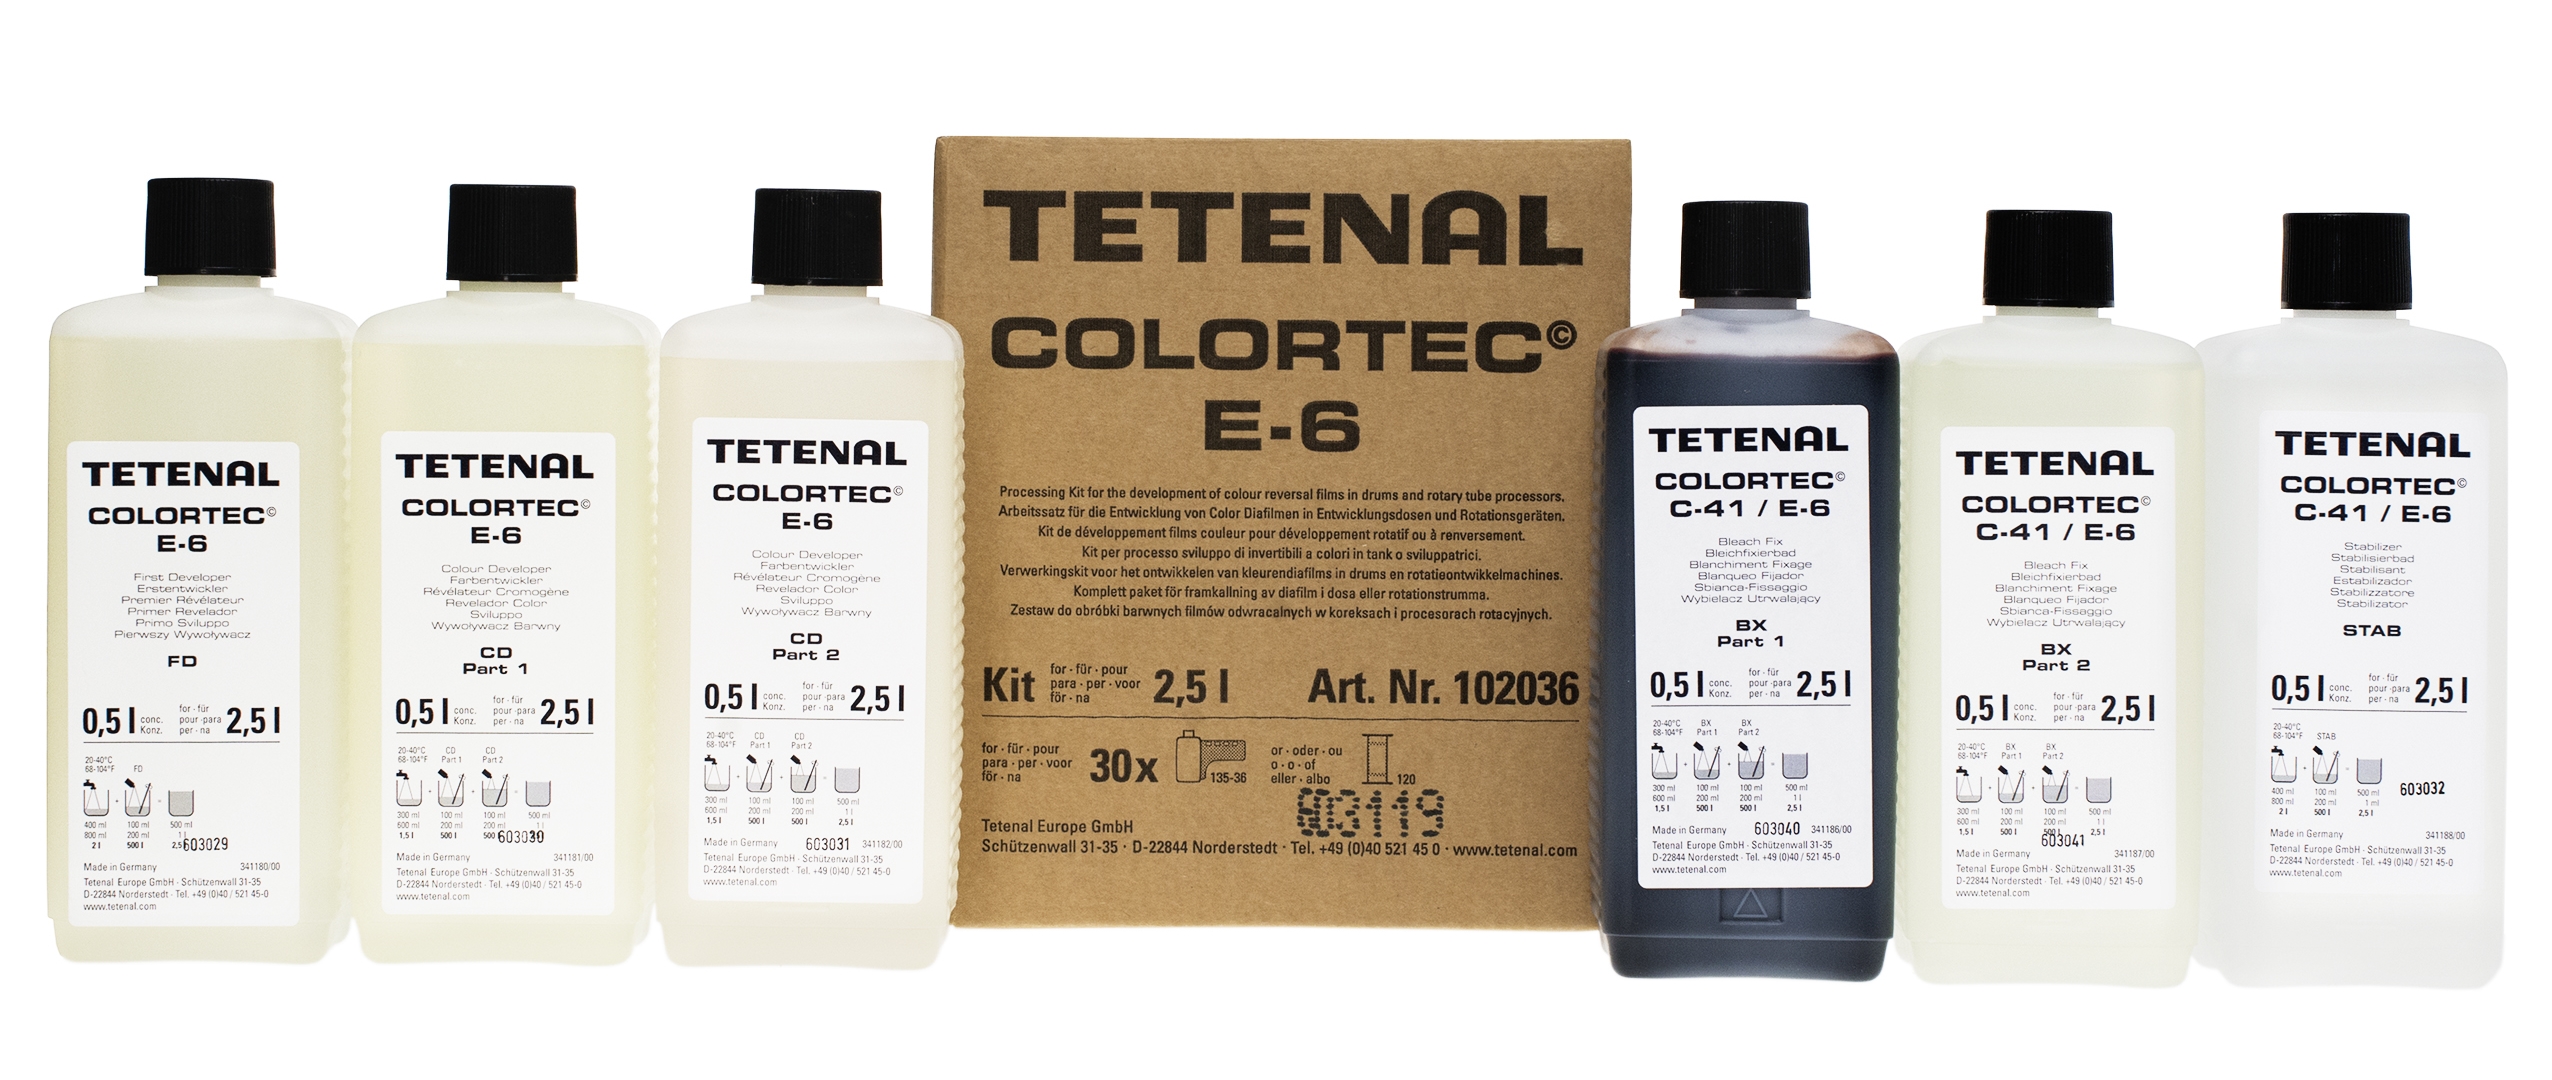 For color slide film E-6 given the name of the kit, Tetenal E6 3-bath kit, you would expect 3 baths, while in reality there is a 4th bath. Don’t worry, it comes in the box. For this process you will need to mix up a first developer, color developer, blix and stabilizer. The instructions booklet clearly indicates how this needs to be done. Since the working solutions can only be kept for a few weeks, and also because I mainly shoot 120 film, I decided I would make 500ml working solutions.
Phase V: Post-Op
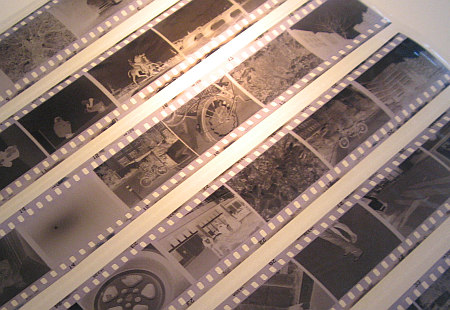 When your film is completely dry, examine it for chemical spots or water marks. If it doesn’t look clean, feel free to put it back on the reel and wash it again. If it looks okay, you’re all set to cut and sleeve it. Congratulations! From here you can make a contact sheet, make prints, scan, tone, semi-destroy or anything else your heart desires.
Creating Your Proof Sheets
Tips & Warnings first! Make sure you always follow the manufacturer's recommendations for fixing, washing and development times: changing them could damage your final print. Your test strip helps you to determine the final exposure for your print. It should reveal both highlight and shadow areas of the photograph which, in turn, will enable you to evaluate those areas for density and contrast. Evaluate for density and contrast in your print in an area with naturally bright light. You should look for good highlights with plenty of detail.
Make sure that your darkroom is well-ventilated at all times. Prolonged exposure to photographic chemicals can be harmful.
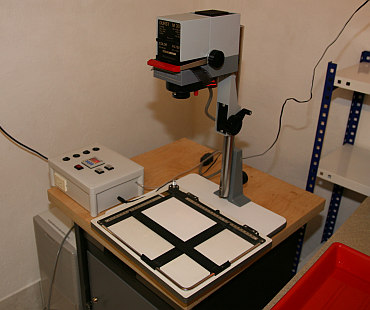
 1. Make sure that the glass on both sides of the proof printer is clean, using tissues with either lens cleaner or plain water. Then set the enlarger lens aperture to f/11. Turn the enlarger on and move the enlarger head up or down until the size of the light cone is greater than the size of the proof printer. Turning the room lights off during this process helps with focusing. Insert an empty negative carrier into the enlarger and focus, then remove the carrier. Be sure your proof printer is centered and within the light cone, then turn the enlarger off. Turn the lights on and note the height of the enlarger head on the column. Set the enlarging timer for five seconds and turn the room lights off again.
2. First, dilute your developer by a ratio of one part stock solution to two parts water, then pour into a developer tray. Fill your stop bath tray with approximately 32 oz. (1 l) of working strength stop bath. Then pour about 32 oz. (1 l) of working strength fixer into your fixer tray. Place your washing tray in or near the sink and fill it halfway with water of between 65 and 70 degrees Fahrenheit (18 to 24 degrees Celsius). Be sure that your developer is at 68 degrees Fahrenheit (20 degrees Celsius) and all other solutions are between 65 and 75 degrees Fahrenheit (18 to 24 degrees Celsius).
3. The test strip method is the best way to determine optimal exposure time to obtain the ideal print density. With lights off and your safelight on, cut a two-inch wide strip off one side of a sheet of photo paper and put that strip in the proof printer, emulsion side up. Align a row of negatives, emulsion side down, then close the printer glass lid tightly. (You can tell which side is which by observing how the negatives curl. Negatives curl toward their emulsion side.) Expose the entire strip for a period of five seconds. Next, cover 1/5 of the strip and expose the uncovered part for five seconds, giving the unexposed part a total of ten seconds of exposure. Repeat this process in increments of 1/5, doubling the amount of exposure time for each increment, until the entire strip has been exposed. This gives you bands of 5, 10, 20, 40 and 80 seconds of exposure each. Now remove the strip from the printer.
4. Next, place your test strip into a tray of paper developer and agitate by rocking the tray for 1-1/2 minutes. Remove the test strip with developer tongs, drain, and slip into the stop bath tray, keeping the tongs from touching the stop bath solution. Agitate for five seconds. Then remove the test strip with stop bath tongs and drain before laying the strip in the fixer tray. Agitate it in the fixer for two minutes. After turning on the lights, use the fixer tongs to remove the strip from the fixer tray and place it in the wash tray for 4 minutes. Remove the test strip and squeegee it dry.
5. Set your timer to your desired exposure from your test strip, then turn all room lights off and the safelight on. Next, place a sheet of paper onto the proof printer, emulsion side up, and a sheet of negatives on top of the paper, emulsion side down. Align each with the other and close the printer cover. Expose the paper for the desired length of time and remove the paper. Then place the paper into the developer tray and agitate for 1-1/2 minutes. Remove the paper using developer tongs, drain and place the paper into the stop bath tray, agitating for five seconds. Then remove the paper using stop bath tongs, drain and place into the fixer tray and let it rest for two minutes, agitating frequently. Turn the room lights back on, remove the proof sheet from the fixer tray and drain, then place the sheet into the wash tray for four minutes. When the four minutes are up, squeegee excess water off the paper and let it air dry.
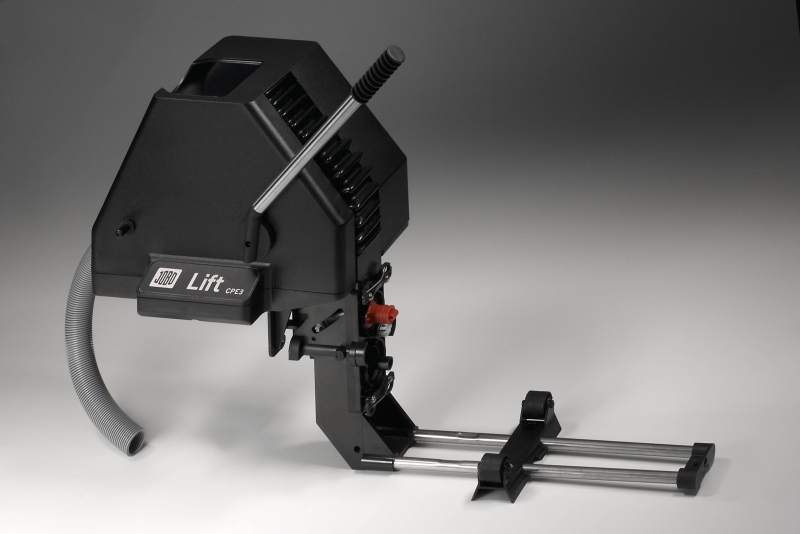
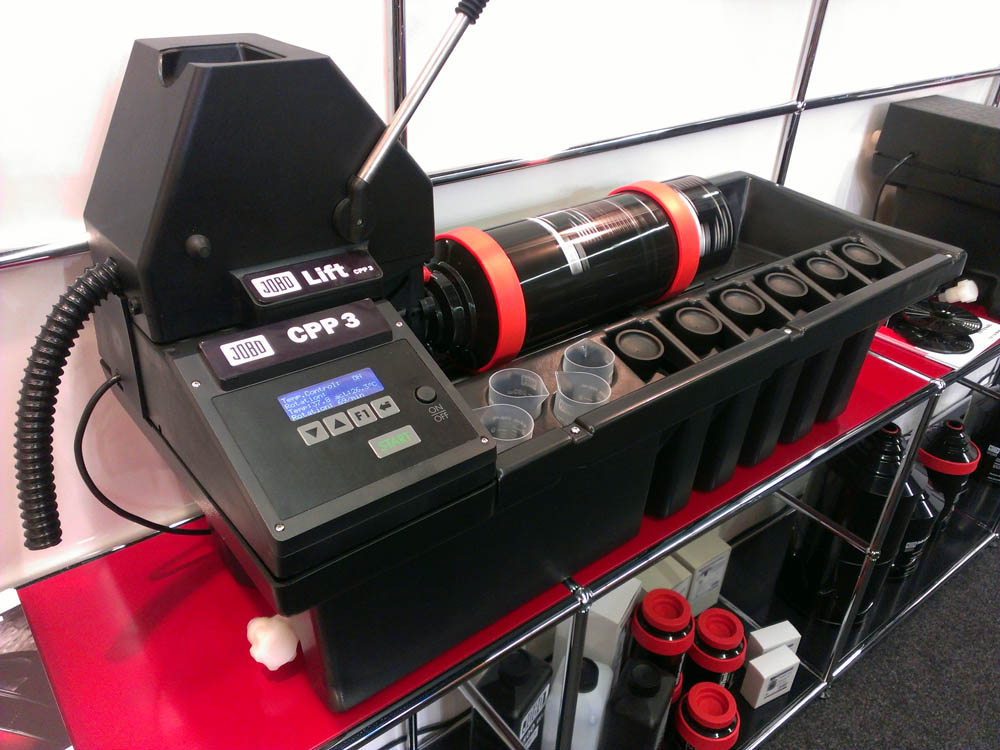 Film processor - CPP3 with lift. This machine is the first new film processor design in almost 2 decades and one of very few currently available film processing machine. The Jobo CPP3, along with the Jobo tank system is a stand alone system, that encompasses the ability to process any analog photographic media from BW roll film, to 2 24 inch sheets of RA4 paper or ULF in practically any format and process available.
The new system is fully backwards compatible with all existing Jobo drums, reels and many other components, such as the lift. Our hands on testing and experience with the new machine was incredible. The machine boasts an 'ATL' like control panel, with a huge, blue glowing multi tasking LCD panel (the back light can easily be turned off when needed by the user).  Making Your Prints
1. You will need the same wet side darkroom equipment you used to make your proof sheets, along with an easel, negative cleaning brush, grain magnifier, your proof sheet, negatives and scissors. First, clean your negative with the cleaning brush and place it, emulsion side down, into your enlarger's negative carrier.
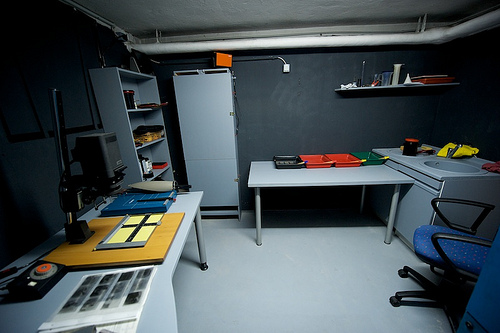
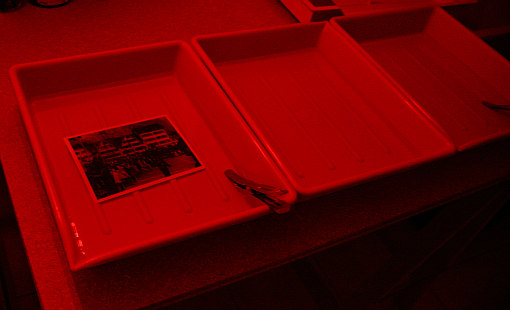
My darkroom in 1963.
4. Now, turn the room lights back off and the safelight on. Turn the enlarger light on, check image focus with focusing magnifier (making sure the lens is at the same aperture used for the test strip) and turn the enlarger off. Place a full sheet of printing paper into the easel, make your exposure, then remove the paper and place it into the developer tray. Agitate your print continually for 1-1/2 minutes, remove it with developer tongs, drain and place into the stop bath tray. Agitate for five seconds, remove with stop bath tongs and drain, then place the print into the fixer tray and agitate for two minutes. Remove the print with your fixer tongs, drain and wash it for four minutes in running water (at same temperature as above), Finally, remove the print from the wash, drain and place it image side up on a smooth, clean tilted surface. Squeegee excess water off the print and into the sink, then lay the print face up on a drying screen or blotter.
 My darkroom in the 1970's
|
Menue
Statistics
Search
Entries archive
Calendar
Search
|
||||||||||||||||||||||||||||||||||||||||||||||||||||||||||||||